Pecan Cinnamon Rolls (Pecanbons!)

Ok, first a story about why I didn’t try and do my usual update last week. Two days off, two kids, two different activities to pull me away from the kitchen. That’s pretty much the long and short of it really.

Now on the story behind the cinnamon rolls. (This will encompass a couple of days)…This past Friday I got a sudden craving for Cinnabon or at least cinnamon rolls. I might be pregnant, except that’s not humanly possible, the only thing I’m ‘pregnant’ with are, pardon the pun, half-baked ideas. So, Friday, I’m willing to stay up a little late to make cinnamon rolls, but I get home late from work, blah, blah, blah, and anyway, I can’t do it. Saturday rolls around (again, pardon the pun) and I happen across this recipe on Yahoo for cinnamon rolls as close to Cinnabon as it gets, by Devin Alexander. If that’s not a sign, I don’t know what is. So, I get home and begin working on some homemade Cinnabon, except to jazz it up I’m going to make the Pecanbon, which is just a cinnamon roll with pecans on top, maybe inside, I can’t remember it’s been so long since I last had one. Either way, this one I tried to follow close with the exception of throwing in some pecans. For the record, this is not a terribly difficult recipe to follow, but it’s a little time consuming with a couple of resting periods for the dough to rise, etc. So, without further ado, peep my homemade Pecanbons!:

IMG_0335

Pecan Cinnamon Rolls


Note: The original recipe calls for light/low-fat versions of whichever ingredients offer them in such variety, substitute as you see fit. (Or fat, hah!)

Cinnamon Roll Frosting:

  • 1 1/2 cups of confectioner’s sugar (powdered sugar)
  • 3 tablespoons of Neufchâtel
  • 3 tablespoons of butter
  • 1/2 tablespoon fat-free milk
  • 1 teaspoon of vanilla extract

For the Cinnamon Rolls:

  • Butter flavored cooking spray
  • 2 tablespoons of butter
  • 1 cup fat-free milk
  • 1/3 of a cup sugar
  • 1/4 of a cup fat-free vanilla yogurt
  • 1 egg
  • 1 egg white
  • 1 packet of active dry yeast .25 ounces (one packet is 2 1/4 teaspoons, in case you’re not using the packets like myself)
  • 4 cups all-purpose flour, plus more if/as needed
  • 1 teaspoon, plus 1 tablespoon of ground cinnamon
  • 1/2 teaspoon of salt
  • 3 tablespoons of corn syrup
  • 3 tablespoons of packed brown sugar
  • 1/2 teaspoon of vanilla extract
  • 1/2 cup of chopped pecans (for added flavor, toast pecans with one tablespoon of butter at 350 degrees for 5-10 minutes)

1. Making the frosting – In your stand mixers bowl, combine sugar, Neufchâtel, milk, vanilla, and butter. Combine for about a minute, switch to high for about 30 seconds. Let it set for about 10 minutes then place in airtight container, can be refrigerated for up to 3 days. Stir before serving.

IMG_0321

2. Making the cinnamon rolls – Use non-stick spray on mixing bowl. Set aside one tablespoon of butter. (Note: If you plan on letting the dough sit all night to double, skip the butter part)

3. In microwaveable bowl combine sugar, milk, and one tablespoon of butter. Microwave for two minutes, until milk heats to 130 degrees. Add yogurt and whisk until sugar dissolves. Add egg and egg white. Continue to whisk. Lastly, add yeast and keep whisking until dissolved.

IMG_0322

4. In your stand mixer bowl add two cups of flour, one teaspoon of cinnamon, and salt. Add milk mixture from step three above. With dough hook attached, mix on medium speed, add remaining flour and mix until dough is formed, roughly five minutes or so.

IMG_0323

Dough should be soft, but not sticky, so add small amounts of flour if needed. Then knead dough further. IMG_0324

Place dough in bowl from step two. IMG_0325

Cover with plastic wrap and allow dough to double in size. This should be an hour if not longer. I left mine overnight, so that I awoke to a dough that looked like this:

IMG_0327

5. Cinnamon filler – In another, small bowl, place corn syrup, brown sugar, remainder of cinnamon, and vanilla extract. Stir well.IMG_0326

6. Once dough has doubled in size, punch it down and place on lightly floured work area. Knead for a minute or so. Dust lightly with more flour. Cover again and let rest for 10 minutes.

7. Spray 11×17 inch baking dish with non-stick cooking spray. Roll out 12×18 inch dough into a rectangle using the baking dish as a size template. IMG_0328

8. Spread your softened butter over dough using knife/spreader/spatula. Drizzle the cinnamon filling over the dough and spread to outer edges. (If adding pecans, now is the time to put them in) Roll lengthwise into tube. Like so:

IMG_0329

9. Cut into eight equal size pieces. Try measuring first. Score dough to approximate the slices prior to cutting. Place rolls into baking dish, spiraled side up. Top with pecans.

10. Place in warm and dry spot, cover with damp kitchen (or paper) towel. Let rolls rise for another half hour.

11. Preheat oven to 350 degrees. Once heated, place rolls in oven 22-28 minutes. Bake until lightly browned and doughy in the center.

IMG_0330

12. Remove cinnamon roll and spread frosting over top and sides. If cold, you can microwave for 10-15 seconds to melt frosting, if that’s how you like it.

13. Enjoy! I did.

IMG_0336

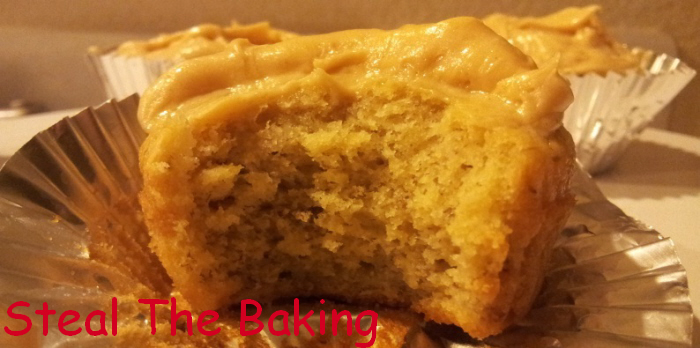
I’ll say this about the cinnamon rolls, they were tasty. They weren’t Cinnabon quality, but they were good. I think I’ve made better, but I’ll say this about the frosting: delicious. Previously, I’ve used the stuff in a can, but this I would definitely use going forward. The pecans were great, but buttered and toasted they would be so much better.

The only complaint I heard was about the density of the bread. It was pretty thick, not light and fluffy like the real Cinnabon. Either way, I think (and my daughter agrees) that they were pretty tasty. One last pseudo-complaint would be the artificial flavoring from the light/fat-free ingredients. If you’re one of those people who has the palate sensitive enough to taste them you may find them inside this recipe, so it’s give and take. Do you want the full flavor, calories and all or would you prefer to spare your waistline, but sacrifice a little flavor in the process? That’s the choice you need to make, but either way, make yourself some cinnamon rolls in the process, they’re delicious.

Crock Pot Bread Loaf…Wait is That Bread Made in a Slow Cooker? Yup.

This isn’t really so much a recipe as much as it is something that I’d heard of a couple of months back and had been wanting to try for a while. I ran into a couple of obstacles, I was looking to take the easy way out and find some pre-made refrigerated/frozen dough to just pop in the slow cooker and work out, but I couldn’t find any in any of the local stores, so that was out of the question. Then on one of my semi-weekly visits to Target I finally found the next best thing in a box of bread dough. It’s essentially everything you need to make a loaf, yeast included. This was what I found:IMG_0200

I decided to try and make my bread the ‘artisan style’, whatever that’s supposed to mean. I feel like it’s just one of those marketing catchphrases, kind of like how everything is ‘high definition’ now, but what do I know. Anyway, the directions were pretty easy to follow, put the yeast in water and stir. Add in the flour package and mix it all up.

IMG_0189

Cover it up in plastic wrap and let it sit for two hours. At that point it should have doubled in size. The only part that wasn’t clear was how much to mix. It says something about mixing to make the dough moist, so that’s where I left it, I didn’t want to over mix the thing.

IMG_0191

After a couple of hours the dough expanded and you can see the plastic wrap actually being pushed out by the chemical reactions going on within. I floured up the sides to make it easier to pull the dough out of the bowl (again, according to directions) and put it into a piece of parchment paper to rest for about 45 minutes.

IMG_0194

The rest of the directions I took from Artisan Bread in Five, I set the crock pot to high and let the machine do its thing. I came back to check on it after 45 minutes just to make sure it was doing all right. The top still looked doughy, but the sides where contact was being made looked a-okay. I left it in for about another 20-25 minutes and then lifted the bread to find a nice brown crust on the bottom, the top was still a little bit on the light side, but the bread was pretty much done. Not satisfied, however, I flipped it over and left it in the crock pot to cook a little longer using just the residual heat.

After all that was said and done and the bread had cooled off it was ready for a slicing.

IMG_0195

How’s it looking? Not too shabby, right?

IMG_0196

I took a couple of slices and made a sandwich for lunch the next day. It was pretty good, you’d never know it was made in a crock pot unless you were told. You could also pop it in the oven/broiler for a few to brown the top. You may find it more enjoyable this way.

IMG_0199

As far as bread is concerned, I thought it was pretty good. I like knowing that it’s homemade (mostly) and that it was fairly easy at that. If you’re at all interested in making your own bread, but it’s too hot to turn on the oven consider this as an option, especially if you have access to the pre-made stuff. No muss, no fuss, just fresh bread in about an hour. Otherwise, find a bread recipe you like, or find a box like I did, and go from there. It’s not all that hard. Seriously, if a guy like me can do it just about anyone can.

What I learned from making this:

  • Whether it’s bread from a box or bread from scratch, they’re not that hard to make. There are plenty of no-knead recipes out there that anyone who knows there way around a kitchen can make on their own.
  • The slow cooker has so much more functionality than I ever knew. For whatever reason, I just thought it was good for stews and soups, but everything from cakes to breads to puddings to white hot chocolate and everything in between can be made in that versatile machine sitting inside the cabinet. Give it a whirl.

I hope you learned a little something and as I see a little spike in traffic I hope you try this and let me know how it went. I’m more than willing to hear what you did with it. Share your own recipes with me, I’m always looking for something else to feed the family, we can’t have spaghetti every week. Yeesh. Until I update again.

Banana Oatmeal Bread With Chocolate Chips

I hadn’t planned on baking anything today, that is to say, I didn’t have a recipe picked out already like I might normally. I thought about making a pie because I’ve never made one before and I’ve covered a lot of the basic dessert groups thus far, but I changed my mind when I noticed some very ripe bananas. I knew banana bread would be a great option. It was 105 degrees outside and while I’ve avoided turning on the oven for the past two weeks it turned out that I had four bananas already a funky looking dark brown. Of course, that’s not reflective of what is inside, but try telling that to the kids. They’re not trying to hear it.

IMG_0179

Anyway, I’m a huge fan of banana nut bread. I heart ❤ it so much. So, I decided to go with something a little more traditional and just make a loaf this time around. In looking for a recipe, I happened upon one that had oatmeal, didn’t like that particular one, so did a more specific search for banana oatmeal bread and found exactly what I was looking for on Multiply Delicious, with the caveat that I didn’t have many of the ingredients to make mine all healthy, so I substituted what I did have and that’s what I’m going to show you today.

Not so many pictures this time around, but you’ve seen batter and the like before, you can imagine what it looks like. Not even much of a story, this is straight forward, plain and simple. That being said, I love understated desserts. I don’t need it set on fire, I don’t need it covered and/or smothered in some form of alcoholic beverage, and I don’t need gold flakes or anything fancy really. Just give me the basics because if you’re not doing that right you’re hiding it with unnecessary bells and whistles.

So, here’s a simple recipe for Banana Oatmeal Bread with Chocolate Chips.

Banana Oatmeal Bread with Chocolate Chips

  • 2 Cups flour
  • 1 cup rolled oats (quick oats will work in a pinch)
  • 1/2 cup white sugar
  • 1/2 cup packed brown sugar
  • 2 tsp. baking powder
  • 1 tsp. baking soda
  • 1 tsp. cinnamon
  • 1/2 tsp. salt
  • 1 1/2 cups buttermilk
  • 2 eggs lightly beaten
  • 1/4 cup of butter, melted
  • 1 cup of ripe bananas, mashed approximately 3 (I used four)
  • 3/4 cup of chocolate chips (optional)
  • Even more optional choose 1/2 cup chocolate chips, 1/4 cup peanut butter chips or 1/4 walnuts or pecans

1. Take all dry ingredients and mix in bowl. Minus the chocolate chips, of course. At this point you could pretty much begin preheating your oven to 350 degrees.

stb1 033

2. Put eggs into bowl for light mixing. I used my stand mixer and the paddle attachment. Add melted butter, buttermilk, and bananas and mix.

3. Add your dry ingredients, keep mixing. Add in chocolate chips, mix well.

4. Spray two 9×5 baking dishes/pans with non-stick spray. Pour batter into your baking dishes. Place in oven for 45 to 50 minutes until a cake tester or toothpick comes out nice and clean.

banana oatmeal bread with chocolate chips

IMG_0178

I thought about completely altering this one by using white chocolate, but I wasn’t entirely sure how well the flavors would work. I also contemplated peanut butter chips, which would have gone well. A combination of chocolate and peanut butter would have been great, too, as would have been chocolate and pecans (walnuts are out of the equation because my Misses is allergic), in the end I used what I had in the house. Problem solved, but experimenting in the future is always an option.

This is where I talk about what I learned from making this recipe. Um, this one is pretty straight forward, so I’m having a little difficulty here, but how about this.

  • When placing two baking dishes in the oven at the same time there’s a good chance that your dish will skew towards the back end of the necessary time and may even run over. You might be able to tell from the photo above that the bread came out a touch earlier than it could have and came out, not raw, but a touch dough-y.

This bread goes perfect with cold milk and can be used as a dessert or a breakfast bread of sorts. You could also make muffins out of the batter if you choose. Cut the baking time in half and keep an eye on the muffins so that they don’t overcook.

In summary, if you like banana bread and you’re looking for something to make give this one a shot. My girl absolutely loved it. I hope you do as well. As always, thanks for reading and I hope you share with friends and family.