S’mores Cupcakes (or Chocolate Graham Cracker Cupcakes With a Graham Cracker Crust)

I’ve been kicking around this idea for quite some time and when I was asked to make a little last minute treat for company, I figured this might be a good time to work on them. So, I did a little bit of research and after looking at multiple recipes I decided a little combination of three simple recipes would help me achieve more or less what I wanted. These are the three recipes I pilfered elements from: Cupcakes Take the Cake –S’mores cupcakes, Annie’s Eats –S’mores cupcakes, Culinary Couture Blog –Chocolate graham cracker cupcakes. A little idea from each went into these to make a very tasty cupcake. My only issue with these was that I didn’t try to make a frosting because it was so last minute, so I used Jet-Puffed marshmallow fluff for a jar and while it gave me the desired (more or less, anyway) flavor, it was not pretty at all. You know, this stuff:

 66144cf

But, like I said they were good and I didn’t hear any complaints. Forgive me for not having better pictures, but I had a lot of people in the house and all I have is a couple shots of the finished products. Sue me.

20130805_002519

Here comes the recipe:

S’mores Cupcakes

  • 1/2 cup of flour
  • 1 and 1/2 cups of graham crackers finely ground
  • 2 teaspoons of baking powder
  • 1/2 stick of unsalted butter
  • 2/3 cup of sugar
  • 1 generous teaspoon of vanilla extract
  • 2 eggs, room temperature
  • 3/4 cup of milk
  • 1/2 cup of cocoa powder

For the Graham cracker crust:

  • 1 and 1/2 cups of graham crackers
  • 1/3 cup of butter melted
  • 1/4 cup of sugar (I skipped this ingredient, it was sweet enough without it)

1. Preheat oven to 350 degrees.

2. Grind about 40 graham crackers in food processor to make 3 cups. Split into two portions of 1 and 1/2 cups each. Set one aside for crust.

3. Melt butter in microwave and add 1 and 1/2 of graham crackers (plus sugar if desired) and mix well.

4. Spoon 1 tablespoon of mixture into cupcake liners and tamp down with small glass.

5. Place in oven for 5 minutes. Remove, but maintain oven temperature.

6. Combine flour, ground graham crackers, cocoa powder and baking powder in one bowl. Set aside.

7. Cream butter and sugar. Add one egg and mix well, then add second and continue to mix while adding vanilla.

8. Add flour and graham cracker mixture to creamed butter, alternating with milk and continue mixing until batter has a nice consistency.

9. Spoon mixture into cupcake liners to 3/4 full. Place in oven for 18-20 minutes or until a toothpick comes out clean.

10. Cover with your marshmallow frosting, small marshmallows, Jet-Puff, etc. If you have any remaining graham crackers from the crust feel free to sprinkle on top.

Enjoy!

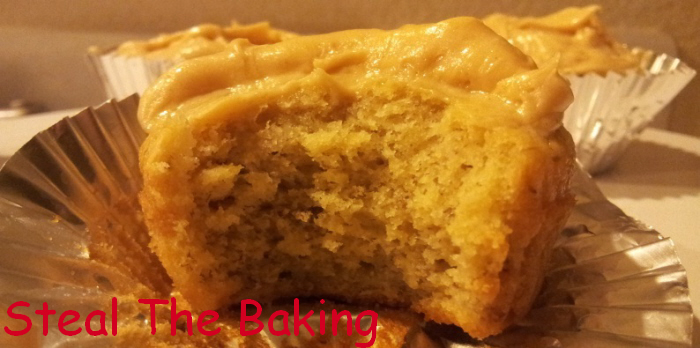
Again, I used Jet-Puffed marshmallow crème, which, while it gives you the marshmallow taste you want for s’mores, it doesn’t look pretty because it goes from fluff to sticky marshmallow goo in no time at all. That’s why my cupcakes look the way they do, but I didn’t have many options due to my time constraints and not knowing that the marshmallow crème would just turn into cream. See?:

20130805_002240

The graham cracker crust gave the cupcake a great flavor as well as a little bit of texture. My only issue was that if you weren’t careful it all stayed in the liner. I found this to be easier to eat with a fork than to eat straight from the wrapper, but maybe that’s me. Who knows? But, hey if you want to try making these your own, feel free. I want to see how yours come out. Until next time.

Mexican Chocolate Chocolate Cupcakes

Sorry for not writing something sooner. I don’t know how many people actually visit to check for updates versus subscribing/following the blog. I don’t get a ton of comments, so it’s tough to tell. In any case, I’m back with something a little different. Shout out to my co-worker May who I was talking to about some other thing and led me to this idea. This will span two posts, as I will post the frosting separately. This recipe is stolen from My Baking Addiction’s – Chocolate Chocolate Cupcakes only I passed on the chocolate frosting and decided to go with an horchata frosting instead. The idea stemmed from a summer party I had last year when I made my Mexican chocolate chunk cookies and horchata ice cream. That was a huge hit and when I was thinking of something to bake this week and I thought of Mexican chocolate chocolate cupcakes, but got stuck with what to top them with. I first thought of marshmallow icing, but that’s not how hot chocolate is drank south of the border. I sat on the idea for a day before I wondered if horchata icing existed. Turns out someone created it, so off I went to the store to pick up the necessary ingredients, namely horchata, but at the store I decided to just go ahead and make my own. Anyway, that’s the other recipe which you will find here: Horchata Icing.

Mexican chocolate chocolate cupcakes with horchata icing

Ok, without anymore unnecessary here’s a recipe that I hope you will enjoy: Mexican chocolate chocolate cupcakes.

MEXICAN CHOCOLATE CHOCOLATE CUPCAKES

Makes about 2 dozen cupcakes

  • 2 cups of flour
  • 1 cup of sugar
  • 1 teaspoon of baking powder
  • 2 teaspoons of baking soda
  • 1 teaspoon of salt
  • 1 cup of unsweetened cocoa
  • 1 cup of oil or 1/2 cup of applesauce 1/2 cup of oil
  • 2 cups of hot water
  • 2 eggs
  • 2 teaspoons of vanilla extract
  • 1 cup (4 pucks) of Mexican chocolate broken up (See here how to do so)

1. Preheat your oven to 350 degrees.

2. Combine all ingredients into large mixing bowl and mix well.

IMG_0044

3. Fill cupcake cups 2/3 of the way with batter. The easiest way to do this evenly  is to scoop from the bottom where the chocolate chunks are and then a little from the top, so that you don’t get a dozen chocolate cupcakes and another dozen with chocolate chunks and not much else.

IMG_0043

4. Bake for 10-15 minutes or something like that, you know the drill, shove a toothpick inside and when it comes out clean they’re ready. Allow to cool before frosting.

Mexican chocolate chocolate cupcakes

5. Eat’em up!

IMG_0052

I ran into a couple of issues with these cupcakes, but I’m not sure which step is at fault, maybe someone out there with more experience could tell me. My cake stuck to the paper more than usual. I’m not sure if it was the Mexican chocolate, the half cup of oil, the cheap baking cups, or even a combination of all of those or none of those.

Mexican chocolate chocolate cupcakes with horchata icing

In any case, I hope you enjoy them with the horchata icing as I would recommend, but do with them what you will. They’re probably pretty good without icing, I wouldn’t know, but I’ll let you tell me below. Until next time, I stole the baking.

Pumpkin and Pecan Cupcakes With Brown Butter Icing

While at work yesterday, someone suddenly got a craving for Sprinkles cupcakes and made the mistake of bringing it up to everyone. That’s when I knew what I’d be up to today…cupcakes! I remembered that I had just picked up a can of pumpkin, which I had intended to use in a pumpkin shake (I’ll probably be posting about that very soon), which would make for great cupcakes. I had also recently made a trip to Costco, where I nabbed a rather large bag of pecan halves, so I’ve got everything I need to make a delicious cupcake. Plus, there’s a little bonus if you want something extra in the form of white chocolate chips.

Before I get into the recipe I would like to cover one educational thing because I was asked this over the weekend by the cupcake hungry coworker, but on Saturday. The topic is pumpkin, she asked me what the difference was between pumpkin puree and pumpkin pie filling. Pumpkin pie filling is already spiced and is almost ready to go for a pie, whereas pumpkin puree is nothing but pumpkin. The labels are a little tricky because they may both say 100% pumpkin, but if in doubt look at the ingredients and you’ll see for pumpkin puree there is just one, I’ll let you guess at what that lone ingredient may be. With pumpkin pie filling you’ll see a longer list of ingredients. Now you know.

IMG_0281

Now on to the thing you care about a recipe for delicious pumpkin cupcakes with pecans and/or white chocolate chips with brown butter icing. The two recipes were adapted/lifted from Brown Eyed Baker (the cupcakes) and Martha Stewart (the icing). Here’s what you need:

IMG_0272

Pumpkin Cupcakes with Pecans

Makes approximately 32 cupcakes

  • 4 cups of cake flour sifted
  • 1 teaspoon of baking soda
  • 1 tablespoon + 1 teaspoon of baking powder
  • 1 teaspoon of salt
  • 2 teaspoons of ground cinnamon
  • 1 tablespoon of ground ginger
  • 1 teaspoon of ground nutmeg
  • 1 teaspoon pumpkin pie spice
  • 1/4 teaspoon of ground cloves
  • 1 cup of unsalted butter, room temperature
  • 2 1/2 cups packed light-brown sugar
  • 4 large eggs
  • 1 cup of buttermilk
  • 1 1/2 cups of canned pumpkin puree
  • 1 1/2 cups of pecan pieces
  • 1 cup of white chocolate chips or regular chocolate chips (optional)

**Note that in my Kitchen Aid stand mixer everything goes nearly to the top of the beater blade. Not sure if mine is 4.5 quarts or 5 quarts, but be wary if using something smaller if something smaller exists.

1. Preheat oven to 350 degrees. Place cupcake liners in muffin tins.

2. Sift your flour and add baking powder, baking soda, salt and spices.

3. Cream together brown sugar and butter until fluffy.

4. Add eggs, one at a time and beat thoroughly into mixture. IMG_0273

5. Add flour in three parts, alternating with 1/2 of buttermilk. Mix well.

6. Add pumpkin. Mix well. IMG_0274

7. Add pecans and/or chocolate/white chocolate chips. Mix.

What I did was make half of my batter with only pecans and with the remaining batter I added the chocolate chips, both chocolate and white chocolate.

IMG_0276

8. Fill liners about 3/4 to the top. I used my Oxo Medium sized cookie scoop; two scoops was perfect and made for some very uniform cupcakes.

9. Bake for 15-18 minutes at 350 degrees, rotating two tins midway through baking.

IMG_0277

Get up close and personal with this pumpkin and pecan cupcake.

IMG_0280

Want to top it with something a little different? How about this very simple brown butter icing?:

Brown Butter Icing

  • 4 tablespoons of unsalted butter
  • 1 cup of sifted powdered sugar
  • 1 teaspoon of vanilla extract
  • 1-2 tablespoons of milk

1. Grab a small saucepan and toss in your butter. Heat on medium high heat until you get a nutty brown color. The whole process takes about ten minutes or so. Remove from heat and pour into a bowl.

2. Add sugar, vanilla and one tablespoon of milk, stir until smooth. If your icing is too think add in remainder of milk a little bit at a time until you reach a spreadable consistency. Allow five minutes to cool

I think mine was a little too runny, but I spooned it over my cupcakes anyway. Or at least over a good portion of them. The recipe may not cover all 32 of your cupcakes, but there’s always a few people who prefer them un-iced, de-iced, without icing.

IMG_0282

I picked this recipe mainly because of the sheer amount of cupcakes it yielded. Many of the other recipes would only net me a dozen cupcakes, which wasn’t going to cut it for me. I’ve got to share these with friends and family. For the record, they were well received. I hope you dig these. Let me know if you do. I like the comments, they’re so few and far between.

IMG_0283

IMG_0293

Okay, normally I write something about what I learned, but I don’t really have much to share this time. They’re cupcakes and they came out well, with the exception of the brown butter icing, which wasn’t bad, just a little runnier than I hoped. I probably could have fixed it with more powdered sugar, but there’s enough sugar in these bad boys, right? Do we really need more? I says no. Anyway, let me know what you think of these and how you might improve on them or make them differently. Until next time.

–B.

Snickerdoodle Cupcakes With Cinnamon Buttercream Frosting

I’m now only a week behind. If I actually cranked this out, I’m not used to the wordpress feel of things, I could get up to speed in a little bit, since I am familiar with that layout. (Breaks away from this post to set up Windows Live Writer…) That’s beside the point, though. This time out I decided to try something that someone had given me not that long ago: A Snickerdoodle cupcake. I thought that thing was rather delicious, so I did my best to try and copy it. I returned to the Just A Pinch website where I found this recipe with a cinnamon buttercream frosting. I also decided that this time I would try and pipe the frosting on top. This was the best result:

IMG_0051

The rest were nowhere near this good looking, if you can even call this good looking. By the way, this is a camera shot, not my phone and I figured out how to do the macro (I think it’s macro) shot after taking about a dozen of blurry shots that got deleted.

Anyway, you can see some dry ingredients getting mixed up below. Flour cinnamon, salt, baking powder. The only variation I made from the original recipe was by necessity because it called for 1.5 cups of cake flour and 1.5 cups of all-purpose flour. It just so happened that I only had 1 cup of cake flour, so I just went 1 cup of that and 2 cups of all-purpose. My cupcakes were no worse for wear.IMG_0028

Creaming the butter:

IMG_0029

Adding the eggs one at a time. I read that the best way to do this is to actually add them in separately, as in white then yolk, repeat until done, but I don’t typically have time for that, though I tried this time to try and make these as great as possible.IMG_0030

Add the flour and dry ingredient mixture, it’s starting to come together.IMG_0031

Ladies and gentlemen, I think we have ourselves some cupcakes. I’m down to some leftover Valentine’s themed cupcake liners, so that’s what I used. Get over it.IMG_0032

Close up weird angle.

IMG_0034

The recipe says this would make 24 cupcakes, but I think I could’ve made somewhere closer to 28, but rather than make four more I decided to make some supersized cupcakes in these ramekins that I bought a while back, but never got around to using. Essentially, they’re personal cakes, but whatever you call them they came out tasting better than I ever would have hoped. By this time, you really should be noticing some sort of theme in my kitchen-ware. Red mixer, red mixing bowls, red silicone cupcake mold, red ramekins. Yup.

IMG_0035

The ramekins came out of the oven and were perfectly cooked, the top outer edge was a little bit crusty, the center perfectly cooked, with the buttercream frosting on top these thing were delightful.

 IMG_0053

I baked them at the same temperature and I just kept a close eye on them not knowing how long they would take to bake. I used a toothpick to check for doneness and took them out to cool maybe a minute early thinking that the residual heat would finish baking them. I ate it straight out of the ramekin with a fork. It was a hit at home and at work and I will return to these. The lady was not interested when I told her what I was making, but after smelling them she was intrigued and she ended up loving them.

My son had his without the frosting and said that they taste like the cinnamon streusel cakes that Hostess makes in the small 100 calorie packs. He was right, but make no mistake this was far from 100 calories.

What I learned from this:

  • Piping is hard, getting these cupcakes to look as good as the one in the photo was a real challenge. The ones not included in photos just look like they fell on the floor and got smothered and ruined the original piping. First time, though, so I think I did ok enough considering.
  • They say butter should be at room temperature, but when it’s super hot outside even with the A/C on inside butter melts pretty fast, so as a friend recommended, put it in the microwave for 10 seconds and work it from there. I think my butter was a little too far gone to fix the buttercream, so I ended up working some butter flavored shortening in to add some stability. Maybe in reality I should have done half and half. I’ll try that the next time.

Hey, thanks for looking at this. I’ve got a bundt cake for you next time, nothing too fancy, but I bought a bundt pan and wanted to use it and this recipe fit the bill. Thanks and catch you on the flip side.

Before Steal the Baking Blog – Banana Cupcakes With Peanut Butter Cream Cheese Frosting

I had some nice ripe bananas sitting on the kitchen counter, so I just knew I had to do something with them. I found this recipe for Banana cupcakes with a peanut butter frosting on BonApetit.com, so that’s exactly what I made. This time I don’t have as many pictures because I had company over and I was making dinner (spaghetti with Italian chicken sausage), so I really only have pictures of the finished product. You may recognize the pictures as what I use for the blog photo masthead (or whatever it’s called).

I’d like to think that this will be the last time that I have to apologize for blurry or out of focus pictures taken by my phone, but it probably won’t be. Still, as I’ve mentioned already I’m trying to switch over to my dedicated camera and those shots already look waaaaay better. Just wait and see.

If you look at the photo above you’ll see that I made the same mistake with the frosting that I did on the previous cake I posted. That is, I beat the frosting with using the beater blade and not the whisk attachment. I’ll get it eventually. The frosting was creamy and tasted really nyum anyway. I gave some to my daughter’s friends who were over at the house who had to put up with wondering what I had been up to for the previous weeks smelling cakes and cupcakes and not getting to even sample a single bite. I’ve gotta say that they tasted great. Peanut butter and banana is super tasty. The only thing that might have made this any better would have been a little chocolate, maybe some chocolate chips or one of those mini chocolate squares tossed in the center, hell, you want to make this the best ever? Throw a Reese’s peanut butter cup mini inside, that would make this too awesome.

Again, I was hoping to work on icing using a bag, but this was definitely not the right consistency, so I just used a spoontula to lay it down on the cupcake.

I went back to the 3/4 measuring cup to drop the batter into the foil cups to give them some uniformity. I’ve since placed an order for a little tool that should help make this easier, but I’ll discuss that a little more when it shows up.

You may have noticed, if you looked at the recipe that I deviated just slightly in that I did not use peanuts on top. I think that might have been pretty nice, but I didn’t have any and it’s too hot outside to be making extra trips just for one little thing, so I decided to pass up on them. I don’t think they were really missed anyway.

Yup, that was good. I would like definitely make these bad boys again, maybe I’ll take my own advice and drop a little present inside next time. Until next time, thanks for even taking a look at this and doing whatever it is you do with it.

P.S. The reason I make mention of these as existing before the blog is because I have posted these pictures elsewhere on the net and I don’t want to be accused of stealing them or otherwise, so rather than go through that I just mention it this way. I’ve got one more cake to post and then we’ll be all current.